Framed Art Gallery Wall
One of the benefits of organizing my craft space, an ordeal chronicled in Hoarder to Order, was rediscovering a lot of prints and frames that I had been squirreling away. Once I realized how much art I had just lying around I decided it was time to finally tackle a project that had sort of intimidated me, a framed art collage.
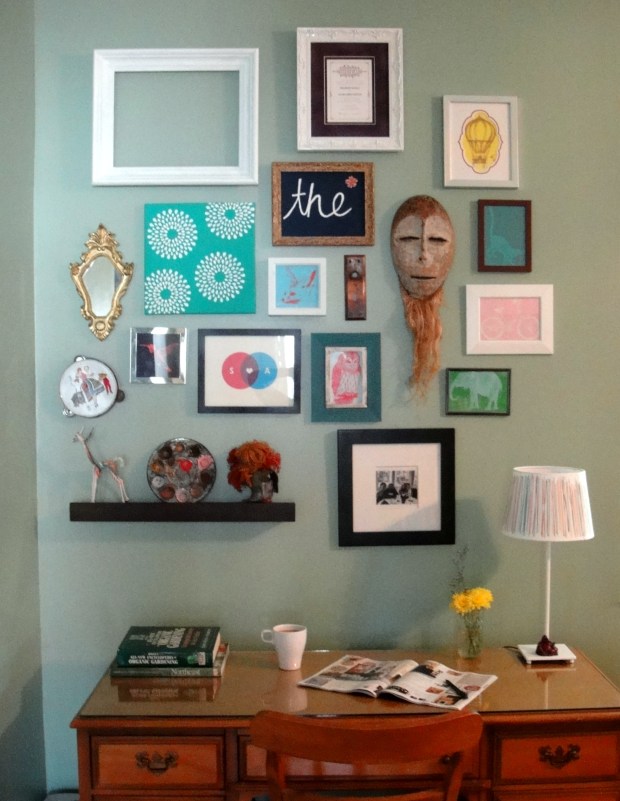
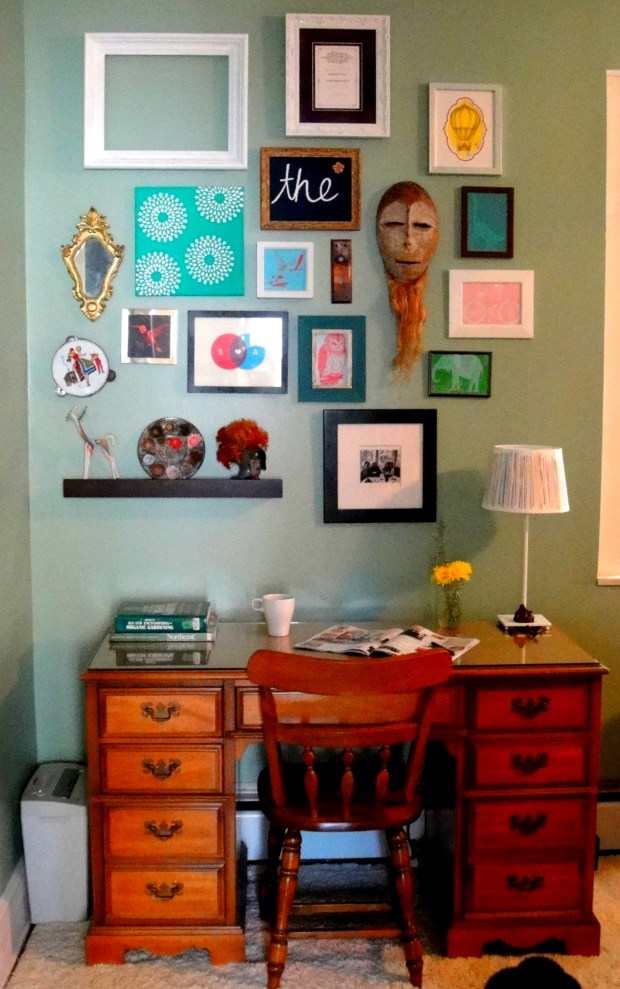
My living room is sort of a long space, not quite a bowling alley, but close. Because of this, I’ve divided the area into smaller vignettes so the room is more functional and inviting. One of those areas is a work space, but I wouldn’t have called it a vignette at the start of this project. The very barren wall distorted the scale of the desk making it look absolutely tiny in a room with 9 1/2′ foot ceilings. Also, with nothing to visually anchor the space, the miniature furniture seemed to sort of just float around in the corner of the room.
Here’s how I turned that vacant space into a gallery feature.
Step 1: Measure the space. You’ll need to know how much area you’re looking to cover so that you can complete Step 2.
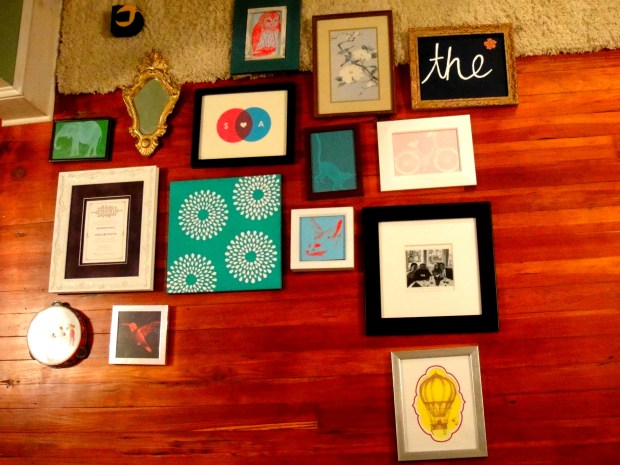
Step 2: Gather art and objects that inspire you. Your wall needn’t be limited to standard frames or even art in frames. Some of my more unique items include a 1950’s toy tambourine and an antique copper doorknob plate.
{I grabbed everything I had laying around the house that could possibly be affixed to a wall so I had plenty of options}
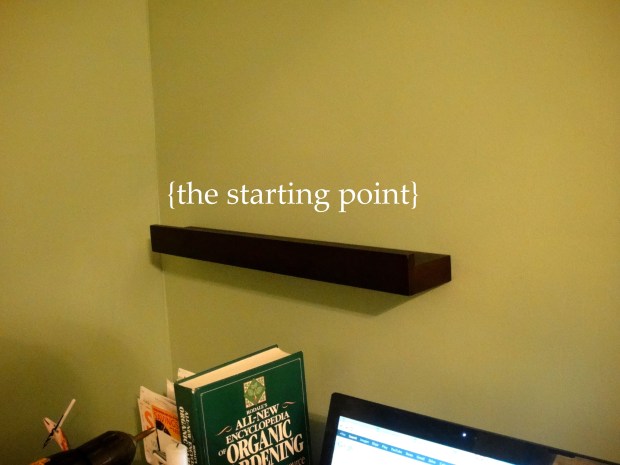
Step 3: Pick a starting point and start hanging! I hung my West Elm Picture Ledge first and worked from there. I would hang one piece and then arrange the next two or three around it to make sure they complemented each other. A gallery wall is eclectic by its very nature, so I didn’t want to over think it.
However, if you’d like to have more of a plan in mind before you put holes all over your wall, which is an entirely reasonable attitude, there are some alternate methods for assembling framed art collages.
- Method One: Get a large sheet of butcher paper cut to the size of your soon-to-be gallery wall. Lay the paper on the floor and arrange the artwork on the paper as if it were the wall. Next, trace the frames and mark the position of the hanger. Then tape the paper to the wall and use it as a map of where to place your nails. Then, remove the paper and start hanging your artwork.
- Method Two: Trace the outline of each piece of artwork onto sheets of paper and cut them out. Stick double sided tape or poster putty to the backs of the cutouts and start placing them directly on the wall. Move the pieces around until you get the look you’re after. Then, take down your first paper cutout and hang the artwork it represents in its place. Repeat this process for each piece.
These methods don’t seem particularly difficult, but I liked the freedom of picking pieces as I went along.
Step 4: Stand back and enjoy. I think a gallery wall works when the whole is greater than the sum of its parts.
{ meaningful pieces meant to inspire}
{inviting + bright work space}
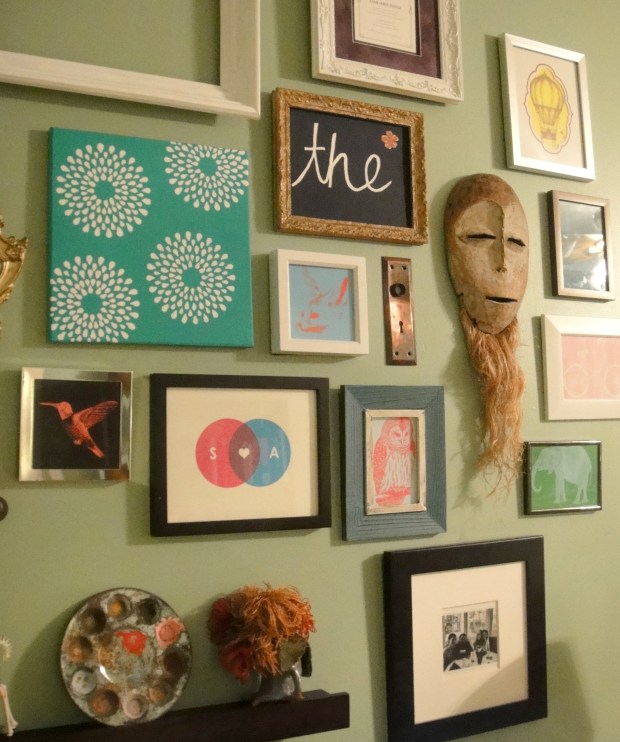
{some standout pieces: our wedding invitation beautifully framed + a venn diagram with our initials}
Some of the brighter prints were images that I loved, but the originals had very different styles and a spectrum of colors that didn’t compliment one another. I ran them through the duo-tone process in Picasa to make them more simple, modern and bright.
This gallery wall has definitely made the area more inviting and visually anchors this space. If you’ve made a gallery wall or found a way to make your work space more inviting, I’d love to see it.





ooo..i am definitely going to try this 🙂
Let me know how it goes! I’d love to see it.
will definitely share a pic when i do
Wonderful idea + looks fantastic…
appreciate all your photos + tips~
Thanks so much. The hardest part of this project was just making the commitment to get it started. 🙂
Looks great!!
Do you remember where you got most of the prints? Thanks! 🙂