
Woodland Felt Mobile | Instructional
 Hands down, one of my favorite parts of getting ready for baby Sam was decorating his nursery. (One of my least favorite parts was going to Babies R’ Us over and over again because I kept forgetting things.) For his nursery, I wanted equal-ish parts whimsy and simplicity. For the walls, I chose a calming mint green (which sadly has not helped him sleep through the night), a no-frills crib, and these prints that I just adore. I also knew from the get-go that I wanted something handmade in his room, so I decided to make this handsewn woodland felt mobile. Here’s how I did it:
Step 1: Research and Doodle
I started out by googling images of the animals I wanted to include on the mobile. My criteria for picking my critters was a) Can I draw it? b) Is it cute? c) Could it be found in the woods semi-near where we live? I ended up with a bear, a skunk, and a fox. 
Here’s the little bear sketch I did. Once I had it drawn up, I cut it out and then used it as a template for the other side. Next, I joined the sides together with tape and figured out how much extra felt I’d need for their bellies/tails/other 3D parts.

These paper models really helped me visualize the final product. I should note that now that I have a Cricut, I think this sort of project would be 100x easier.
Step 2: Cut the felt and sew!
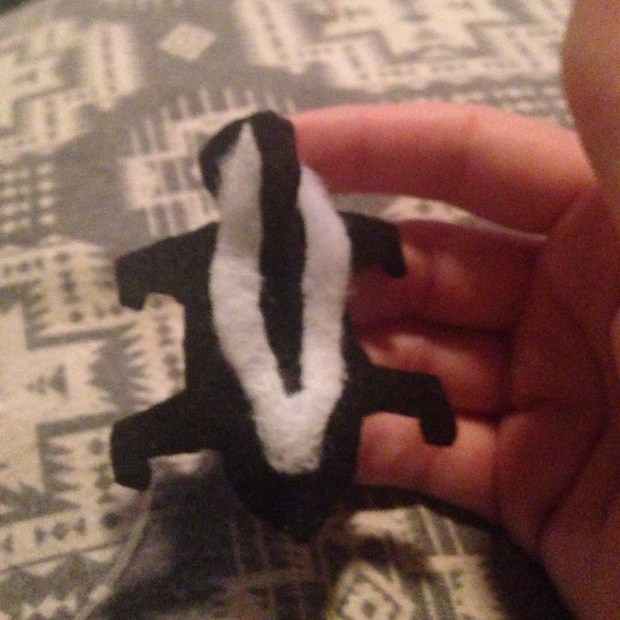
Once I had all the parts together, I started assembling. Here you can see the skunk before it was stuffed. For this one, I made the black body first and then sewed on the white stripes.
Step 3: Stuff them!
Once the felt “pelts” were sewn together, I stuffed them with batting. To ensure it was evenly distributed and sturdy, I used a chopstick to really pack it in. Then, I used matching thread to do additional detail work, like adding ears. For eyes and noses, I kept it simple and just whip stitched them in black. 

Here’s the finished felt Fox. That baby belly was the perfect built-in table!

A pine tree, an oak tree, and a couple of clouds to finish up the forest. 
Step 4: Hang and assemble the mobile
I wanted this mobile to be very delicate looking, as if it was floating above the crib. So, I chose an embroidery hoop and monofilament as my main materials. This part was a serious challenge. My husband and I had to balance these very small and lightweight stuffed animals and then connect each of their individual monofilament strands to a center strand that would hang from a single hook on the ceiling. All while being careful not to cross the monofilaments with one another, which was especially difficult as you couldn’t really see them. It took a long time, a LOT of patience and the use of drinking straws and toothpicks to align the monofilament correctly, but it turned out great. Comment for details and I’ll give you a step by step, but it’s honestly too boring to type out here. I’m sure there’s an easier way to do this, but we couldn’t come up with one at the time. In the end, it turned out beautifully and I still absolutely love seeing it every time I go into the nursery.


