
Semi-DIY wedding favors
Crafting is a huge hobby of mine, so getting married last month was not only wonderful because I got to marry my best friend, but it also gave me license to craft and design all sorts of things for the past year, and it was awesome. Since our wedding, I’ve happily shifted gears back into home design mode, but looking back at our wedding pictures sort of makes me long for X-ACTO knives and ribbon.
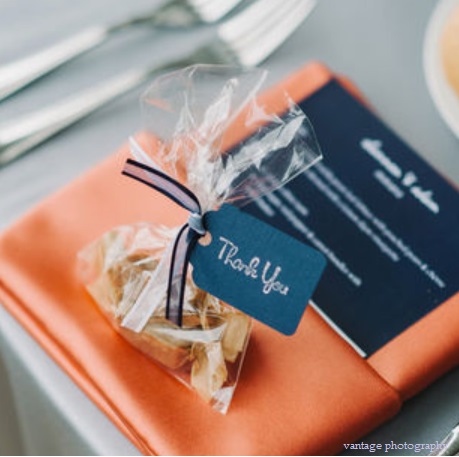
Assembling my wedding favors was one of the easier ways to be a DIY bride and these went perfectly with the rest of my decor. The cellophane bags looked great in the candlelight at the guest tables and the ribbons and tags helped carry my navy, white and coral color theme. Plus, with a cost per favor around $3, they were pretty affordable. If you’d like to make these for your upcoming event, the instructions are below.
Supplies needed:
- 3″ x 4″ cellophane bags (sold in packs of 100 for around $5)
- Ribbon (6″ of each color for each package) You want to use ribbon thin enough to easily fit into the hole from a standard hole punch
- Heavy cardstock paper – I used 12″ x 12″ textured cardstock in the color “admiral” and I got around 16 gift tags per sheet
- Jumbo gift tag craft punch, seen here
- “Thank You” rubber stamp
- Ink Pad – I used a bright silver metallic
- Standard size hole punch
- Scissors
- Nail file
- Optional: shallow cardboard boxes for easy transport
- Non-optional: One very helpful bridesmaid!

Okay, so once you have all of your supplies gathered, this whole project operates well in an assembly line. First, you can fill your cellophane bags with your treats (I ordered the most amazing fleur de sel caramels from Nicole at the Caramel Jar.) Next, take your gift tag punch and punch out as many as you’ll need; if you have a helper, she could start stamping them with your message now. We noticed in doing this project that the ink took more than 10 minutes to dry, so don’t try to rush it. In fact, while you’re waiting for them to be dry enough to handle, you can take your ribbons and cut them into 6″ lengths. (Sidenote: the Recollections craft punch is awesome, but on occasion it did leave some rough edges. We found that a nail file buffed out any imperfections beautifully.)
When the tags are dry, you’re ready to tie your bags. Take your standard hole punch and, well, punch a hole in the tag. Then, run your ribbons through the hole and tie the bag closed. Maybe it was because I had two different colored ribbons, or because of the decorative tag, but I didn’t feel the need to tie a bow. We just double-knotted the ribbons and fanned out the ends. From gathering supplies to clean-up, it took around six hours to make 115 favors. Lastly, I know it’s customary to eat wedding cake on your one year anniversary, but I’m quite certain that we’ll also order some more of these fleur de sel caramels.


Do-it-yourself (DIY) favors are not only cheap wedding favors but are also couple’s personal gifts that shows their appreciation to their guests. Your family and friends would surely love the delectable fleur de sel caramels daintly packed in cute cellophane bags. I would like to apply this DIY brilliant idea on my wedding supplies too!:)
Hi Jean – sorry for the delay. I hope you were able to use this idea for your wedding supplies!